Become an expert shot on the peg this season by following these 10 commandments for better shooting
Shooting well increases satisfaction and pays due respect to the quarry. It is, moreover, a waste to perform badly when almost anyone may, with just a little effort, shoot proficiently. Competent, elegant shotgun marksmanship is not beyond anyone who works for it. Besides, if you are going to miss – and we all do – why not miss in good style? Creating a simple plan for self-improvement does not take much effort but it does require a bit of discipline and sustained motivation. Those who shoot skilfully get the most from the day – not least because they attend to it and its details more. Some have more natural ability than others, of course, but everyone can be turned into an expert shot with requisite effort. Here are my 10 commandments that will take you from an average to an expert shot.
10 WAYS TO BECOME AN EXPERT SHOT
1 HAVE FUN
Never forget this top tip. It is a privilege just to take part – as a gun, a beater, a dog handler or in any other capacity. There are so many benefits. Shooting is good for you, good for the group of friends it involves, and good for the countryside it protects and the future of which it preserves. We can set out to enjoy every day when we have the opportunity and great fortune to be out shooting.

2 SAFETY
Do not take guns or gun safety for granted. Most accidents occur with ‘unloaded’ guns, although happily, in Britain, field mishaps are rare. Check and recheck chambers are unloaded when appropriate (notably when taking them in and out of slips) and barrels unobstructed before loading and after shooting. Become muzzle aware. We all know the words of the famous poem: ‘Never, never let your gun/Pointed be at anyone.’ The rule is too often breached as guns are taken from cars carelessly. Always expect surprises in the field too (the sudden appearance of a beater, courting couples, dogs and so on). If ever in the slightest doubt about a shot, don’t take it. See plenty of daylight: avoid any temptation to shoot low or outside a reasonable arc – don’t stretch it beyond 10 and two on a clock face. Other than when grouse shooting, I avoid shots behind the line now. Most of us think we are safe; most of us could be safer. It begins with accepting that accidents are possible. All of us are fallible. Determine that, should you make an error with a gun in hand, the muzzles will be pointing in a safe direction.
3 LOCK ON
Stare each bird to death: maintain perfect, sustained visual contact with the bird. It is much easier said than done. Staying focused on the bird or any other moving mark is hard work. It takes mental and physical effort to do it well once, let alone repeatedly (and all the more when there are multiple birds in view). Just try tracking a moving aircraft, or indeed a bird, in the sky with a pointed finger. It will immediately become apparent that keeping focus ‘locked on’ requires significant visual and mental effort – far more than most realise. If you develop the skill of sustained visual contact, you will unlock fantastic powers of hand-eye coordination within yourself. And it is about more than just physical focus: it is about a total connection with the bird or mark.

Harry Wills (Host of Beach Estate and gun)
4 STAND WELL
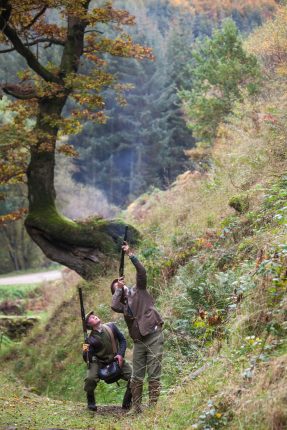
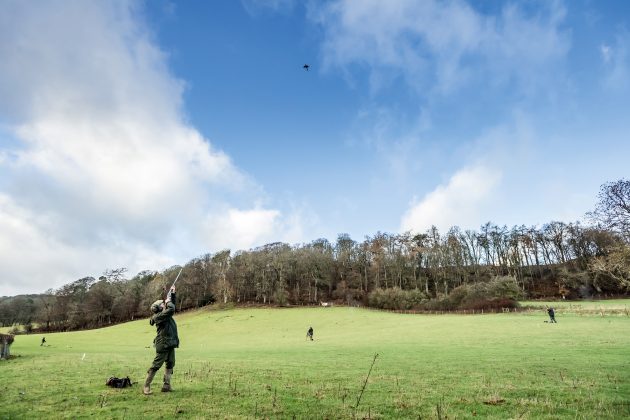
Stay in balance. Often when looking down a shooting line, you will see people standing poorly and who are clearly out of balance. We have different styles but feet should not be too far apart. If they are wide-spaced, balance is not improved but swing is impeded. Shoulder-width foot spacing is about right for most: 6in to 12in between heels or thereabouts. Backs should not be bent forward (again because it impedes both mount and swing) and bottoms should not be sticking out either. Stand erect but relaxed, weight favouring the front foot. As you take a high shot you may naturally come into an elegant Stanbury hip-forward bow, you may maintain a central balance or you may bring weight on to the back foot deliberately. On higher birds, not taken straight driven, it makes sense to step into their line: the front foot and barrel moving together smoothly and without delay. The object is to avoid tension at the moment the shot is taken. If you want to keep it simple, ‘nose over toes’ is a good dictum for basic stance.
5 GUN HOLD
You need to hold the gun efficiently. The rear hand should be comfortable: the web of the hand should not be positioned too high on the grip (slap the butt of a proven unloaded gun and simply slide the hand forward to take up a perfect, tension-free position on the grip). The fore-end should drop naturally into the palm of the rotated front hand. The front hand should not be extended too far forward as this may restrict the swing and lifting. Muzzles should be held safely up. I like the gun butt almost brushing my side in the ready position (sometimes, on ‘high alert’, one may naturally hold the gun out further). One should not grip the stock too hard fore or aft, but you need to exert positive control both to point the gun well and because the hands absorb a lot of recoil force.

6 PRACTISE YOUR MOUNT AND SWING
Be sure to develop and practise your mount and swing (the mount is part of the swing and generates power for it). Dry practice with a proven empty gun is useful. In your ready position, the stock comb should be about level with the forearm, muzzles held above the eyeline. Those having issues may benefit from a start position where the butt is tucked slightly under the armpit à la Mr Churchill (although not as fully back as he suggested nor with barrels as low). The gun has to be pushed out from this start. The technique ensures the stock comes up to face and shoulder well. It also encourages both hands to work together (imagine wires attached at the muzzles and heel and a celestial puppet master lifting both simultaneously). The front hand still leads. It points to where you are looking (and you may want to partially extend the index finger on the fore-end to facilitate this). Assuming a swing-through technique and a normal presentation, mount the gun to the tail feathers of the quarry and move through body and beak with control but without hesitation. The shoulder comes to the butt sole; the butt is not pulled aggressively back to the shoulder (which will interrupt swing). The mount should not be rushed, nor should the rear hand dominate. ‘Windmilling’ about the fulcrum of the front hand is to be avoided. And don’t forget your timing – one, two, threeeeeee on every shot – always three beats but with tempo varying depending on the range, speed and angle.
7 SHOOTING TECHNIQUE
On higher birds start further behind than for closer birds. In my ‘graduated swing-through’ system, I would insert the muzzles behind the bird roughly as far as I estimate it needs lead in front. I find this a useful way to find line and generate good movement. You may also start on the bird and push forward (I call this ‘point and push’) or maintain a lead, staying in front all the time. In the latter case it might be a measured lead applied, as some wildfowlers and skeet shooters prefer, or you may maintain lead instinctively, relying solely on hand-eye coordination. Many have no idea of how they relate to a bird – whether they come in from behind, come on to the bird or stay in front. They bank on practised focus and hand-eye coordination. If it works – fine. No (or not much) attempt is made to see a gap or apply forward allowance consciously; these ‘naturals’ depend entirely upon visual connection and instinctive pointing. Simple advice considering all the above? Focus on the bird, take your front hand and barrels to it, keep the barrels moving on and shoot without hesitation as the right lead develops – whether it is seen or felt – and follow through well.

8 UNDERSTAND VISION
Most men should shoot with both eyes open because binocular vision aids judgement of speed and angle and facilitates hand-eye coordination. Many women will have difficulty doing this, as will men who have cross-dominance, central vision or other issues. Moreover, not everyone is well advised to keep both eyes open at the moment the shot is taken. It all depends on eye dominance. This needs to be tested carefully. Some may be wise to squint or dim the eye opposite the rib as they shoot (or just before) to avoid visual confusion. Other options might include putting a block on shooting glasses or having equipment modified to counter error caused by eye dominance. Those with eye-dominance issues may still pick the bird up with both eyes (and benefit from a wider initial field of view initially). Changing shoulders may also be an option early in a shooting career for those absolutely dominant in the ‘wrong’ eye. Finally, be warned: eye dominance may change inexplicably on occasion or over time.
9 GET THE GUNS AND GUNFIT RIGHT
For game shooting, I am fond of 20-bore 30in and 32in over-and-unders weighing around 7lb. I also like 30in 12-bore side-by-sides that are of similar weight and 12-bore over-and-unders no more than 7½lb. Heavier, longer and lighter guns can work but they may not handle as instinctively for normal driven work. As far as fit is concerned, many mass-produced guns are too low in the comb. The simple test is to mount a proven empty gun at 45 degrees skywards and see if the bead remains visible with normal cheek pressure applied. If not, the stock comb may need to be raised. Seek out a pattern plate, focus on the mark and fire without protracted aiming. Is the pattern central (over the mark) or going left or right, high or low? Slightly high is fine. A textbook distribution is 60:40, though my preference is 50:50. Too low is an issue to be corrected. Many men, as they age, find the left eye doing more than it should with regard to eye dominance. This may indicate a need for extra cast-off (for a right-hander) in compensation. Many stocks need raising too. I have lost count of the number of stocks where I have put the comb up ⅛in or ¼in at heel and added a similar amount of cast. This is not a universal prescription, of course. If in any doubt, seek out a professional gunfitter. Check your patterns and chokes. What constriction? Sticking to KISS (keep it simple, stupid), 1/4 and 1/4 is good for dedicated steel use (and works well enough to 35 yards). If using steel and lead, 1/4 and 1/2 would be a decent choice. Pellet size? No 5 or No 6 for lead (possibly heavy-payload 4s for very high birds in the right gun). The best steel pellets for driven game? Assuming standard steel, No 4s (the largest pellet allowed in a CIP standard steel load).
10 MANNERS MATTER
Never has it been more important to deport oneself like a sportsman. Game shooting is not a competition. Do not be greedy. Do not poach. Do consider others. Respect the quarry. These are old givens. Small kindnesses and manners mean much on the shooting field. Make an effort to take in the beauty of your surroundings, connect with them, appreciate the work that has gone into the day and help those who share our wonderful passion. Consider each shooting day a gift.
To read the top 11 tips on how to shoot pheasants click here.


